Wednesday, July 31, 2013

Science Notebooks


Science Notebooks
     Do you use science notebooks at your school?  If so, how do you use them with the little kiddos?  For the past 6 years my grade level has used science journals.  We create one "notebook" per unit of study (which consists of construction paper covers and handwriting sheets stapled in the middle).   We have a glossary where we record important terms, but lacked definitions or meanings.  We never really used the glossary after writing the words in it.  In the front of each notebook, we would record our findings and make illustrations of our explorations.  At the end of each quarter, we sent the notebook home, never to be thought of again, I bet!  

BUT, not anymore!

     I had the opportunity to hear Sandy Reyes talk about science notebooks and journals, at the Extraordinary Educators Conference in Chicago.  She works with STEM programs and you can learn more about her and science notebooks from her blog at The STEM Lady.  
      The first thing she told us is that a science notebook should become a student's own nonfiction text.  I had never thought about it like that.  What better way to teach nonfiction text features than to have the students create a nonfiction text while learning science?!  She suggested having the students set up the entire notebook: numbering pages, creating the table of contents, glossary, index, etc.  I know that with my little ones, they do MUCH better with a template, especially at the beginning of the year.  
      So, I decided to create a basic starter kit for my science journals.  I created a packet that has different covers for small and large journals, a table of contents template, glossary templates, diagram empty spaces, and index templates.  I also took the essential standards for NC 1st grade and created questions.  Sandy Reyes suggested starting each lesson with an essential question and allowing the students to determine how to answer the question and allowing them to use the inquiry model to it's fullest.  Even if you are not an NC teacher or a first grade teacher, some of these questions are broad enough that they could be used across states and across grade levels.  
     I am REALLY looking forward to using science notebooks in my class and having them become a nonfiction text that my students grow to love writing in, reading, and sharing!  
     You can grab a copy of my Science Notebook Starter Kit at my TpT store by clicking on the picture below!


How do you use science notebooks in your classroom?  What have you found that makes them the most meaningful?
-Michelle

Tuesday, July 30, 2013

Babbling About Math...Model Drawing and Greg Tang!


      When I told a few friends how EXCITED I was to go to math sessions at the Extraordianry Educators Conference in Chicago, they thought I was CRAZY!  I was thrilled for an opportunity to attend two sessions with Greg Tang and a session with Anni Stipek about model drawing.  Both of who, presented strategies for math instruction that I hope to implement immediately upon returning this fall!  

Model Drawing-
      Are you familiar with model drawing?  I am incredibly lucky to get to work with tow fantastic AIG (Gifted) teachers at my school.  THey both have provided me with information about model drawing and resources for practicing model drawing.  Being during the year, when they gave me this information, I kept putting it off and saying I would figure it all out later.  Well, later arrived!  
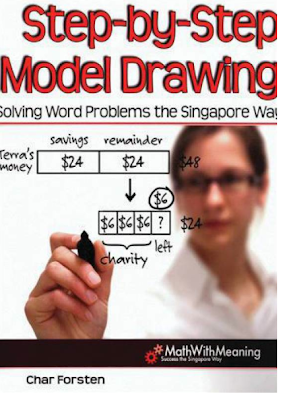
      Basically, model drawing creates visual representations that can be concrete at first and then they become more abstract.  We learned about model drawing by practicing solving problems using model drawing.  We began very basic and moved to 4th or 5th grade Common Core Standards.  I am NOT a fan of fractions, but with model drawing, I could solve a 5th grade fraction problem, quickly and accurately!  It was all about the way the problem was set up and processed.  
      It teaches students to identify the parts of the problem, what the question is asking, decide what the answer they are looking for is, and then they begin to model the problem.  This is an excellent book for understanding how to use model drawing.  


      This is a website that I did use last year.  It lets the students determine the known numbers in the problem and the unknowns. They can resize the blocks to demonstrate the differences in values and then solve the problem.  It is a great way to have students practice.  My students used this website on the Smartboard, during math stations.

Greg Tang- 
     I could tell you about Greg Tang's presentations FOREVER!  So, I will try to keep it short and sweet. If you ever get the opportunity to hear him speak/present, you need to go!
      One of his biggest focuses during the sessions was the importance of teaching students to THINK well!  He began by asking how smart people are different than the rest.  He went on to explain that smart people are able to take information and apply it (generalize) to new situations by making connections.  Students who are good at math are able to take what they know about numbers and apply it to new situations with numbers.  
      He went on to talk about the connections we make with numbers.  He stressed the fact that too many students do not make connections when moving from counting single objects to counting groups and therefore they remain what he called "counters".  Counters are those students who when given a math problem will almost always resort back to counting b/c of the way they see the numbers.  For example, when I see a 5, I shouldn't just see a set of 5 ones, I should also see a group of 2 and 3.  Teaching this thought process early on will build a strong mathematic foundation. My goal this year is to NOT create a group of counters, but to create deep thinkers who SEE numbers differently!  
    I could honestly talk about his session forever, so here are a few other things you should look into:
  • Funny numbers (teaching 2-digit addition) This is GENIUS!!  Look into how he says to teach funny numbers.  It makes SO Much sense! I am counting down the days until I get to teach this!
  • His games and worksheets.  He has a ton of FREE games and worksheets at www.gregtangmath.com.  
  • His books are FREE and online with animation.  
  • He has printable games in color that could be laminated and put in a math station/center.  
     I know, I know, I am babbling!  I just had to share some about these great sessions.  They had me ITCHING to get back in the classroom and start teaching math!  
     If at the least, google Greg Tang and Model Drawing. I promise it will be worth your time!

-Michelle

Monday, July 29, 2013

Monday Made It Class Journals Galore!


     I am linking up with 4th Grade Frolics for Monday Made it!  I LOVE this linky!  It reminds me that I NEED to finish my projects on my project list.  Speaking of that, my project list has about 20 items listed and I don't have a ton of time left to get them all done!  Oh well!  They will be done when they are done.
      Many of the bloggers I follow are already getting their hands dirty in their classrooms.  We are not allowed in our classrooms yet, so most of my to do list items are things that I can work on at home and prep before the year begins.  Here are some things I have finished:

 1. Class Journals- 
      I have noticed a lot of posts on Pinterest about class journals. I decided to create my version of class journals.  Most of the ones I have seen have had one prompt on the cover.  I wanted my journals to allow for more than one prompt to be used throughout the year.  So, I labeled my journals by numbers.  On the first page of each journal is a prompt for the students to respond to.  I purchased 30 journals from Office Depot for $0.25 each!  WOO HOO!  I actually used an editable Teacher Binder Packet that I purchased from TpT by Bridget at www.littlelovelyleaders.blogspot.com.  I created the covers using a template for the teacher binders and cutting it down.


      Do your students always want to share stories and ideas with you?! My kids always want to share and I wish I had more time in the day to talk to them about what they want to share. SO, I thought this would be a great way for my students to not only practice letter writing, but also share their thoughts with me.  In this notebook, the students will write letters to me and then I will respond to their letters!  
2. Take Home Teddy Journal- 
     I always have my students take turns taking home a Teddy and his journal in the beginning of the year.  See my post HERE about Take Home Teddy and for a little freebie.   

3. Teacher Binder- 
     Our school does not require us to print our lesson plans and for the past few years I have used www.planbookedu.com.  Because of this, I have gotten a little less organized with student information and I have not been as good at keeping everything together.  So, I purchased an editable Teacher Binder kit (mentioned above) and started piecing together my teacher binder. I am hoping this will help me organize information as the year begins!

4. Pie- 
     Who doesn't love PIE?  We have a TON Of peaches that we either froze or canned in the last few years.  We need to get rid of some of them, so what better way than making a pie?  I am looking forward to a piece of peach pie when I finish this post!  

Tomorrow I will start on the long to do list I have, but for now, I am going to enjoy a little piece of pie!  

-Michelle


Saturday, July 27, 2013

iMovie Ideas- Chicago's Extraordinary Educator Conference


      So, I told you that my plan is to slowly, but surely, share some of the wonderful bits of information that I learned while at SDE’s Extraordinary Educator Conference in Chicago.  I attended SO many wonderful sessions.  Today I am going to share with you my what I learned at one of my first sessions.  
     One of my first sessions was with Lori Elliot.  The exciting part was that she was the reason why I was there! She was presenting and SDE gave her 10 tuition coupons to giveaway.  I WON!  I couldn't have been more excited!  I won the tuition for all 4 days of the conference.  This is a picture of us after her technology session that I attended.


     Today I am going share what I learned about iMovie.  I know, I know, you are probably thinking you already know how to use iMovie.  I used iMovie this year and a little last year to make videos FOR my students.  Her focus was on having the students use iMovie and the different types of videos that can be created.  
      I am very familiar with making iMovies, however, I had never made a trailer before.  Have you?  When you get started, instead of clicking to start a new movie, you choose to start a new trailer.  
     She showed us some examples of trailers that were created by students.  Here are some ideas for ways students can use trailers:
  • Create a trailer about your favorite book.  Persuade friends to read this book.  The student could take pictures of the book, with the iPad, and insert those in the trailer. 
  • Create a trailer about a character in a book and how that character changes throughout the text.
  • Create a trailer instead of a typical book report. (more for older students)
  • Create a trailer about a historical event or national symbol. 
      As a first grade teacher, I knew that any ideas would have to be adapted for the little ones.  One of the teachers in our session suggested having students create their own trailer when they are student of the week.  They could import their own pictures and add text about their favorite things.  I LOVED this idea and I am hoping to implement it this year!  
      Another idea I had, was a teacher created trailer.  Every year, we have Back to School Night.  This takes place about a week or two into the school year.  All of the parents come to the classroom, without children, and learn about the curriculum, daily routines, expectations, etc.  If you are anything like me, I get VERY nervous speaking to a group of adults.  I can handle tons of first graders, but give me their parents and I start to panic!!  So, I thought about sharing a quick trailer with pictures from previous school years.  I thought this would introduce myself AND lighten the mood, before getting started!  I created my trailer yesterday and it took less than 30 minutes. 
      The best part about using trailers is that they give students a template to type into and tells them where to insert their pictures.  The trailers on the iPad versus a Mac Computer are slightly different.  They have different formats and music backgrounds, offering you a wide variety of options.  

Best of luck with your future iMovies and Trailers!  

There is still a lot more to come from my conference.  Have a great weekend!
-Michelle
Follow on Bloglovin